What is an Agamograph?
Also known as a Lenticular, an agamograph is an art form that uses optical illusion to create that changes when you look at it from different angles.
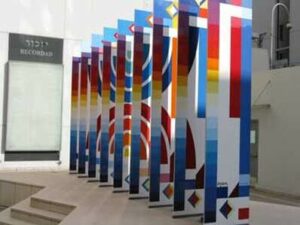
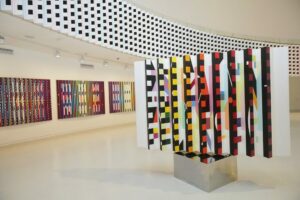
This style of art was named after an Israeli artist named Yaacov Agam who made kinetic art, or art that moves by itself or requires the viewer to move for it to have the desired effect.
Here are a few examples of his work:
Now let’s make our own!
Materials:
2 printed copies of the template – or you can make your own
One piece of paper – 16″ in length (it’s okay to tape or glue two pieces together for this)
Glue stick
Scissors
Coloring medium – crayons, colored pencils, or markers
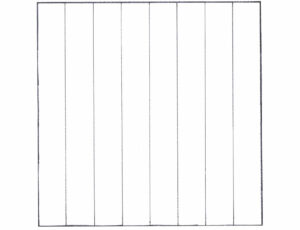
Step 2: Once you have your two drawings finished you’ll want to get out that long piece of paper. It needs to be twice as long as one drawing – if you are using the templates provided, you’ll need a piece of paper cut to 8″ x 16″. It’s okay to tape two pieces of paper together for this. If you have a heavier paper like drawing paper, that is best. If not, printer paper will work too!
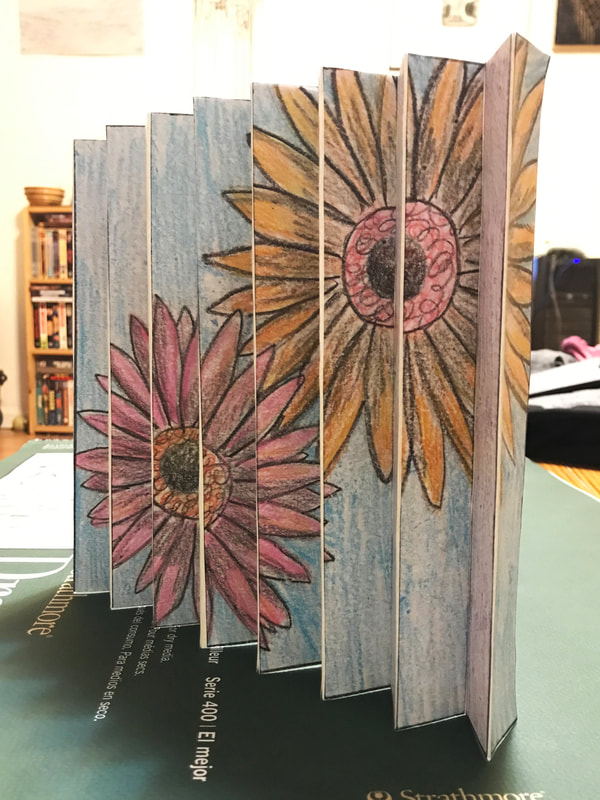
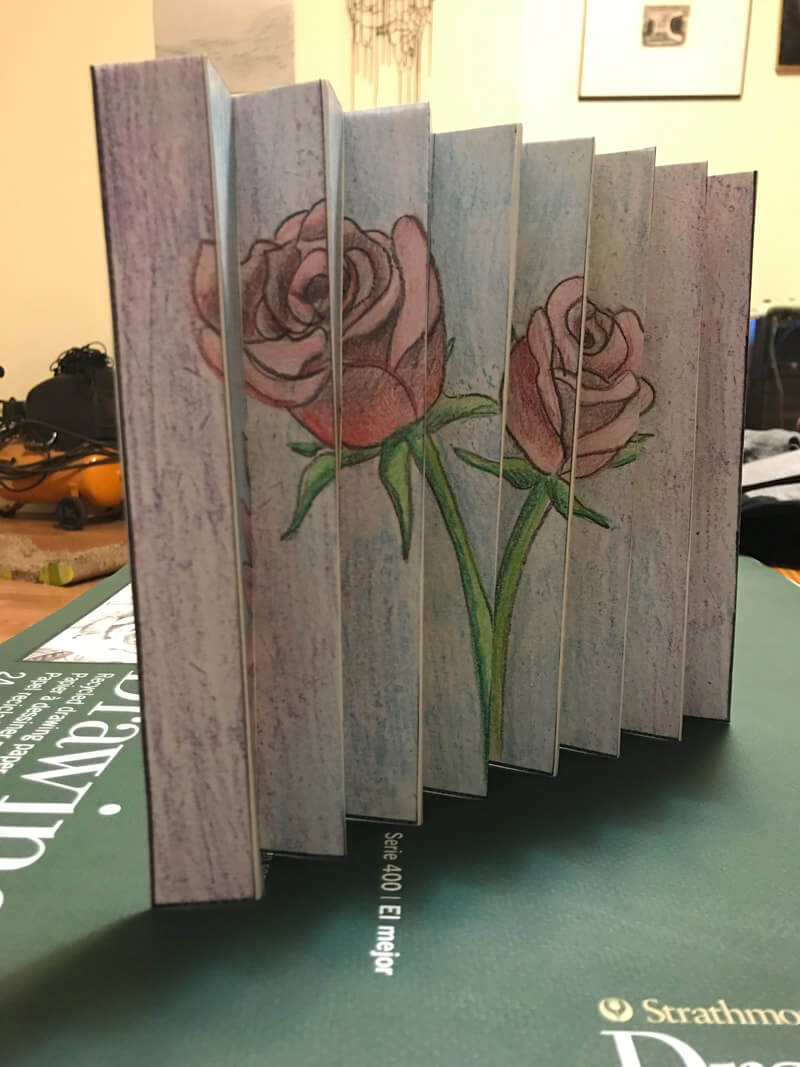
Cut the first strip off of drawing #1 and glue it down. Then you’ll cut the first strip off of drawing #2 and glue it right next to the strip you just glued. Keep going back and forth until all strips have been cut and glued. I recommend cutting as you go rather than all at once to help keep them organized. Once you have them all glued, it should like like this:
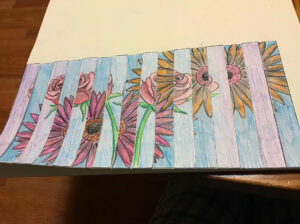
I know it looks funny now but just wait!
Step 3: Carefully fold your paper back and forth accordion style (like you are making a paper fan). Once it’s all folded you’ll need to spread out the folds just a bit until the spacing is right. It looks funny from a front on view but angle your drawing just a bit and look at it from the side. You should see one whole drawing! Now look at it from the other side and you should see your other drawing. Two drawings in one!
|
 |