What’s the difference between a portrait and a self-portrait? A portrait is a drawing of someone else and a self-portrait is a drawing you make of yourself. You can use these steps to make either a portrait or a self-portrait! If you are making a self-portrait, you’ll want to use a mirror to see all of the features of your face.
Materials:
Paper
Pencil
Pencil sharpener
Eraser
|
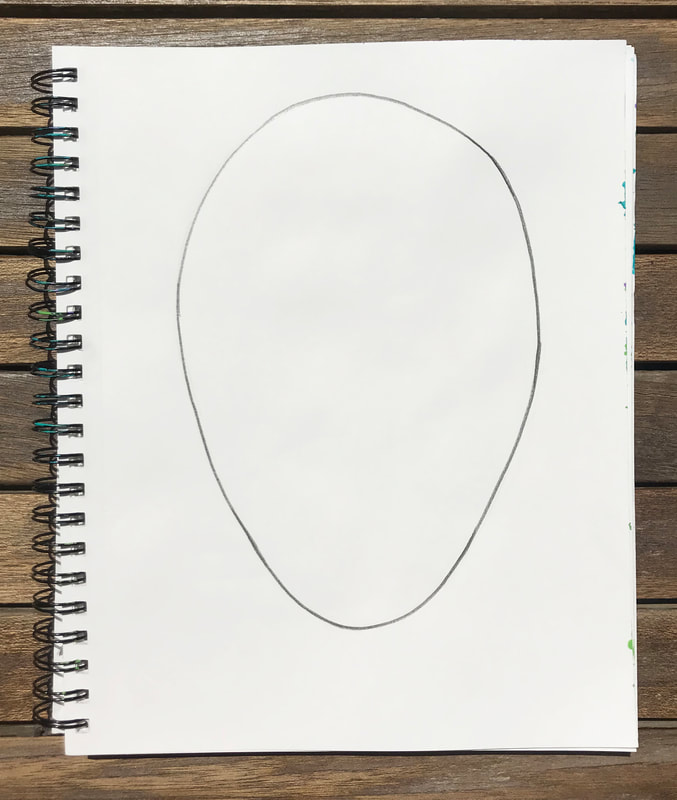
Step 1:
Start by drawing an upside down egg shape. Make sure you are drawing it big enough – we don’t want it to be too small on the page. *I am making my pencil marks dark so they show up in the picture but you will want to make yours very light until you know they are right. Use light pressure and draw your lines so they are just visible – this will make them easier to erase later. |
 |
|
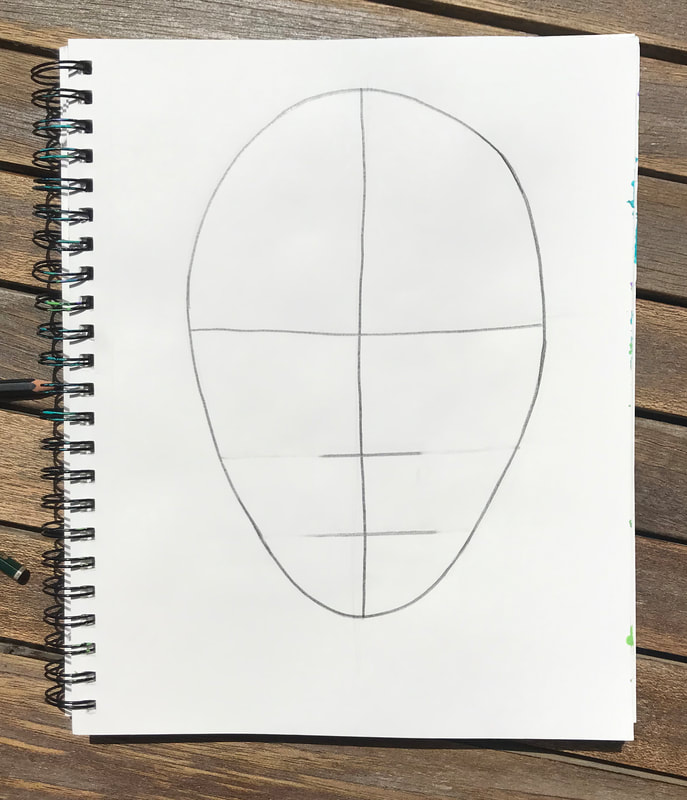
Step 2:
Make some guidelines – again, draw these very light as we will erase them later. It’s important to remember that all of the guidelines and proportions used are for an “average” face – we’ll have to adjust for our own proportions -One vertical line that divides the face in half -One horizontal line that divides the face in half -A second horizontal line that divides the bottom half in half -A third horizontal line that divides the lower section in half |
 |
|
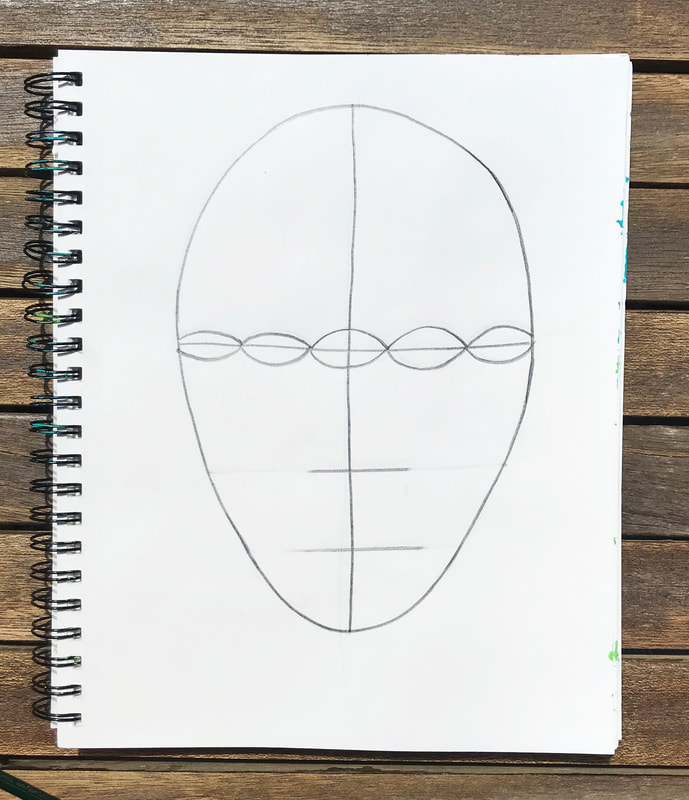
Step 3:
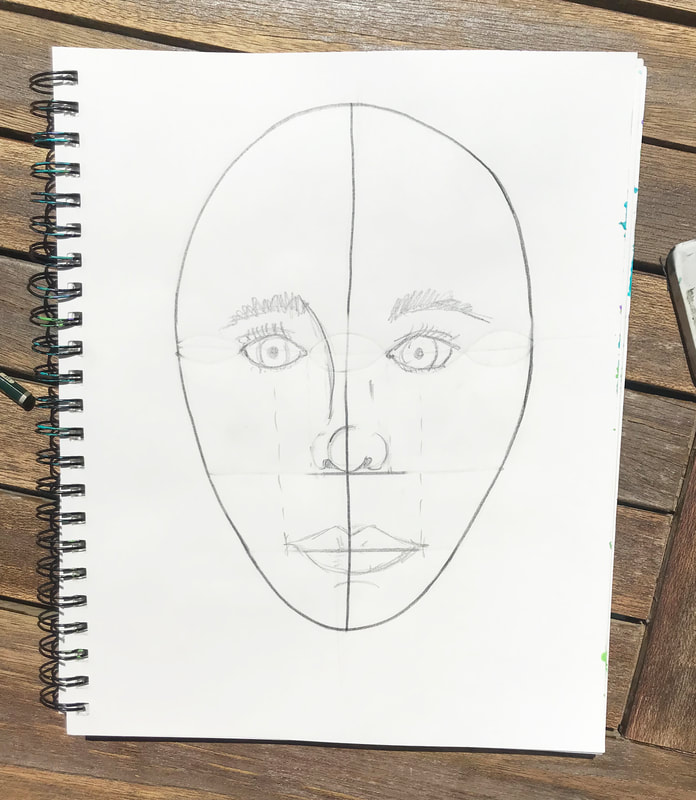
Add the eyes – The average face is 5 eyes wide!It looks funny now, but it’s helpful to draw them all out – Lightly! – and then erase the eyes you don’t need after.You can do some eye shaping here if you’d like – I did mine a little later in the drawing. |
 |
|
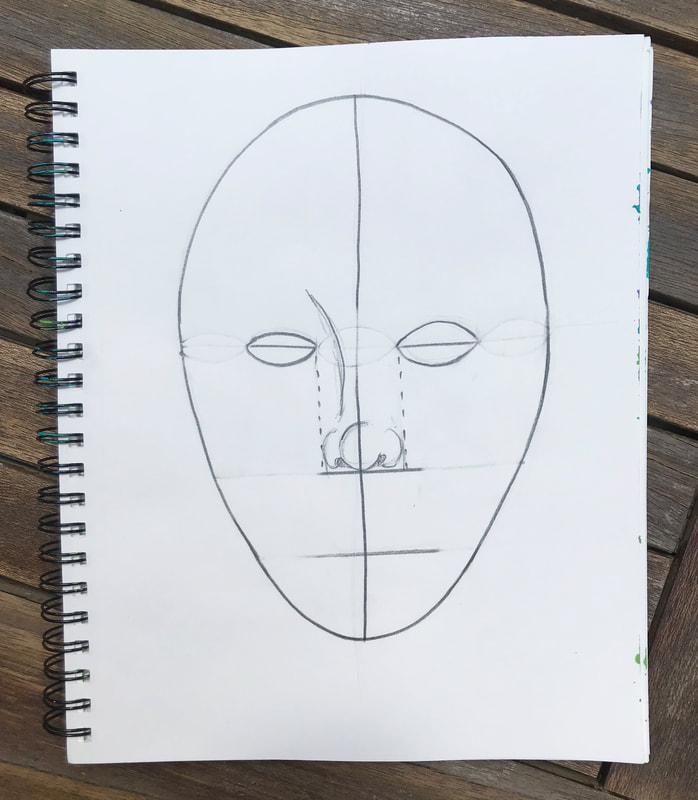
Step 4:
Add the nose – Notice the lines drawn vertically from the inside of the eyes. These guidelines will help show you about how wide your nose should be.Remember: Always look closely at your subject to make sure you are drawing the shape of the features correctly! |
 |
|
Step 5:
Add the mouth – Notice the guidelines drawn vertically from the center of the eyes. They help show about how wide your mouth will be. I also add some eyeRemember: Everyone is different. We may have to draw some features smaller or larger than what our guidelines tell us. |
 |
|
Step 6:
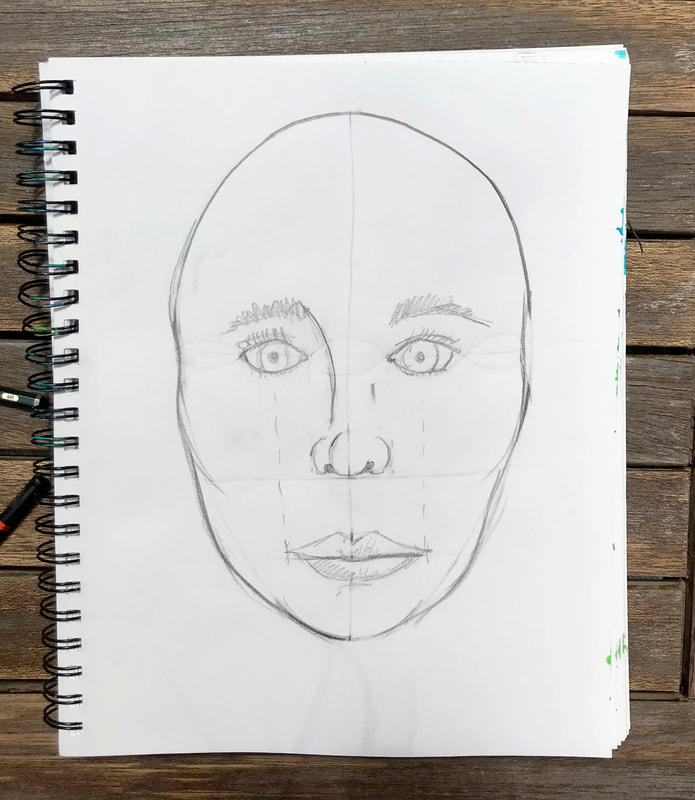
Now is the time to adjust the face shape. Look carefully at how the face is shaped around the eyes, cheekbones, and jawline. |
 |
|
Step 7:
Add in ears if you see them – they sit between the top of the eye and the bottom of the nose.You can also add in a neck – no floating heads here! Make sure it’s strong enough to hold up that head – Feel your neck and notice how it goes right up to your jawline.Add in any finishing touches – Hair, Jewelry, Shading! |
 |